bathroom vanity plans pdf

Bathroom vanity plans PDFs offer a comprehensive guide for DIY enthusiasts, providing step-by-step instructions, material lists, and tips for crafting custom vanities. These plans cater to various styles and skill levels, ensuring a perfect fit for modern or traditional bathrooms. With detailed diagrams and measurements, they simplify the process of building functional and aesthetically pleasing vanities at home.
Overview of Bathroom Vanity Plans
Bathroom vanity plans PDFs provide detailed blueprints for constructing custom vanities, offering versatility in design and functionality. These plans include various styles, from modern floating designs to traditional double sink vanities, ensuring compatibility with different bathroom sizes and aesthetics. Suitable for DIY enthusiasts of all skill levels, they feature step-by-step instructions, material lists, and diagrams. Whether you prefer a sleek, minimalist look or a rustic charm, these plans empower you to create a vanity that enhances your bathroom’s functionality and beauty, tailored to your specific needs and preferences.
Benefits of Using PDF Plans for DIY Projects
Using PDF plans for DIY bathroom vanity projects offers clarity and convenience. These files provide detailed, downloadable instructions, diagrams, and material lists, ensuring accuracy and ease of use. PDFs are accessible on multiple devices, allowing seamless reference during construction. They often include step-by-step guides, making complex tasks manageable for all skill levels. Additionally, PDF plans are easily printable, enabling DIYers to follow along without screen time. This format streamlines the building process, saving time and reducing errors, making it an ideal choice for achieving professional-looking results at home.
Materials and Tools Required for Building a Bathroom Vanity
Building a bathroom vanity requires materials like plywood, MDF, or solid wood, and tools such as a circular saw, drill, sander, and measuring tape for precise cuts.
Essential Woodworking Tools for the Project
Key tools include a circular saw for cutting wood, a drill for drilling holes, and a sander for smoothing surfaces. Measuring tapes and clamps ensure accuracy and stability. A jigsaw or handheld saw may be needed for curved cuts, while screwdrivers and wrenches handle hardware installation. Safety gear like gloves and goggles is also vital. These tools are fundamental for achieving professional results and constructing a durable, custom bathroom vanity.
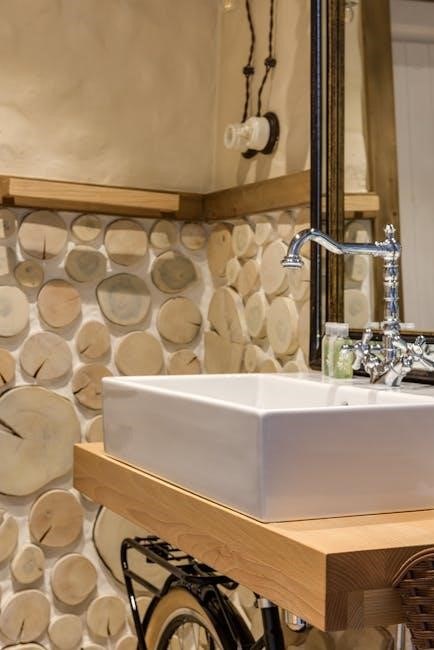
Recommended Materials for Durability and Aesthetic Appeal
For a bathroom vanity, medium-density fiberboard (MDF) and solid wood are popular choices, offering durability and a polished look. Plywood is another cost-effective option, while natural stones like quartz or marble enhance elegance. Laminate or veneer finishes provide moisture resistance and style. Consider water-resistant adhesives and seals to protect against humidity. Reclaimed wood adds a rustic touch, while bamboo offers an eco-friendly alternative. These materials ensure both functionality and visual appeal, making your vanity a lasting centerpiece in the bathroom.
Choosing the Right Bathroom Vanity Plan
Measure your bathroom space and assess storage needs to select a plan that fits. Consider style, functionality, and aesthetics to match your decor, ensuring a perfect fit.
Factors to Consider for Bathroom Size and Style
Assess your bathroom’s dimensions to choose a vanity that fits seamlessly. Consider the style, whether modern or traditional, to complement your space. Measure for single or double sinks, depending on your needs. Opt for floating vanities to save space or classic designs for timeless appeal. Ensure the vanity’s height and depth align with your bathroom’s layout. Choose materials and finishes that match your decor, such as wood, glass, or stone. Consider storage requirements, like drawers or cabinets, to maximize functionality and aesthetics.
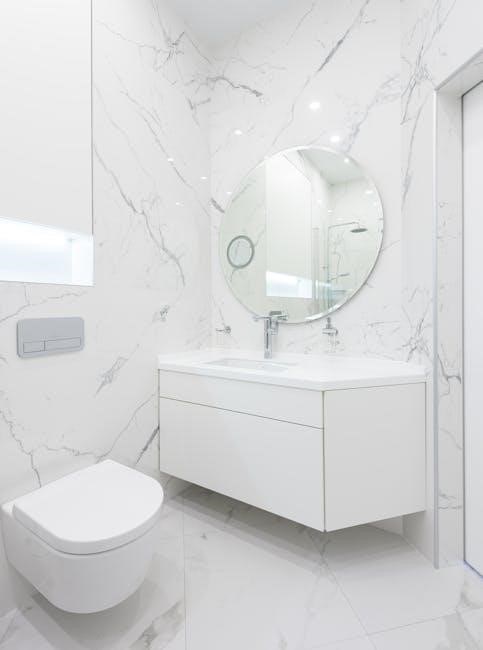
Popular Designs for Modern and Traditional Bathrooms
Modern bathrooms often feature sleek, minimalist designs, such as floating vanities with clean lines and neutral tones. Traditional styles emphasize classic elegance, with ornate details and rich wood finishes. Floating vanities are popular for their space-saving appeal, while shaker-style designs offer timeless charm. Double sink vanities are ideal for shared spaces, blending functionality with aesthetics. Whether modern or traditional, these designs cater to diverse preferences, ensuring a vanity that complements your bathroom’s unique character and enhances its visual appeal.
Step-by-Step Instructions for Building a Bathroom Vanity
Follow detailed guides to measure, cut, and assemble components. Sand, stain, and install fixtures. Ensure precise alignment and secure connections for a sturdy, professional finish.
Preparing the Workspace and Tools
Begin by clearing a spacious, well-ventilated work area. Gather essential tools like a circular saw, drill, and sander. Ensure all tools are in good condition and within reach. Organize materials and hardware to avoid delays. Safety goggles and a dust mask are crucial for protection. Lay down protective coverings to prevent damage to surfaces. Double-check measurements and plans before starting. A well-prepared workspace ensures efficiency and safety throughout the project.
- Clean and organize the workspace.
- Verify tool functionality and sharpness.
- Wear safety gear for protection;
Cutting and Assembling the Vanity Components
Cut materials according to the plan specifications using a miter saw or circular saw for precision. Sand edges to ensure smooth finishes. Assemble components using wood glue and screws, starting with the base and working upward. Use clamps to align pieces accurately. Test-fit joints before securing to avoid errors. Allow glue to dry completely before proceeding to the next step. Proper assembly ensures structural integrity and a polished final look.
- Cut materials precisely to plan measurements.
- Sand all edges for a smooth finish.
- Assemble components with glue and screws.
- Use clamps to maintain alignment during assembly.

Design Considerations for a Custom Bathroom Vanity
Custom bathroom vanities offer tailored solutions, blending style and functionality. Designers balance storage needs, countertop space, and aesthetic preferences, ensuring each vanity complements the bathroom’s overall decor seamlessly.
Optimizing Storage Space in Small Bathrooms
Maximizing storage in small bathrooms is crucial for functionality. Vanity designs with built-in drawers, cabinets, or shelves efficiently utilize space. Floating vanities create an illusion of openness while providing hidden compartments. Incorporating vertical storage solutions, such as tall cabinets or over-the-sink shelves, helps keep essentials accessible without cluttering the area. Additionally, using wall-mounted fixtures and compact organizers ensures every inch is used wisely, maintaining a sleek and organized appearance in even the smallest spaces.
Adding Personalized Features Like Drawers and Cabinets
Personalizing your bathroom vanity with drawers and cabinets enhances functionality and style. Consider adding soft-close drawers for a sleek, modern look or cabinets for concealed storage. Adjustable shelves and compartments can be tailored to your needs, ensuring efficient organization. Many DIY plans include customizable layouts, allowing you to incorporate features like double sinks or center drawers. These additions not only improve usability but also create a vanity that complements your bathroom’s aesthetic, making it a focal point of the space.

Advanced Techniques for Building a Bathroom Vanity
Explore advanced techniques for building a bathroom vanity, such as incorporating floating designs for a modern look or adding a double sink for enhanced functionality. Ensure precise measurements and proper leveling for stability. These methods elevate your DIY project, offering both style and practicality while ensuring durability and a professional finish.
Incorporating Floating Vanity Designs
Floating vanities add a modern, sleek aesthetic to bathrooms while saving space. Using PDF plans, DIYers can achieve professional results with step-by-step guides. These designs often feature wall-mounted units, creating an open feel. Many free plans, like those from Home With Stefani, include detailed instructions for constructing floating vanities. They emphasize proper wall anchoring and precise leveling for stability. Floating vanities are ideal for contemporary bathrooms, offering a clean look and easy maintenance. They also provide an illusion of a larger space, making them perfect for smaller areas.
Adding a Double Sink for Enhanced Functionality
A double sink vanity enhances functionality, ideal for shared bathrooms. PDF plans provide detailed instructions for dual sink installations, ensuring proper spacing and plumbing setup. Many free plans, such as the 32-inch wide double vanity plan, include center drawers for storage. These designs balance practicality with style, offering ample countertop space; The step-by-step guides cover measuring, cutting, and assembling components, making the project accessible for DIYers of all skill levels. This feature is perfect for modern bathrooms needing efficiency and convenience.
Installation and Plumbing Tips
Installing a bathroom vanity requires attention to plumbing details, such as connecting faucets, drains, and water supply lines. Ensure the vanity is stable by securing it to the wall.
Connecting Faucets and Plumbing Fixtures
When connecting faucets and plumbing fixtures, start by turning off the water supply. Align the faucet with the sink holes and secure it using the provided hardware. Attach water supply lines to the faucet’s inlet ports, ensuring they are tightly connected. Use plumber’s putty or silicone sealant to prevent leaks around the faucet and drain assembly. Double-check all connections for tightness before turning the water supply back on. Follow the manufacturer’s instructions for specific faucet models to ensure proper installation.
Securing the Vanity to the Wall for Stability
To ensure the vanity is stable, attach wall brackets to the back of the vanity and align them with wall studs. Drill pilot holes in the wall, then screw the brackets into place. Use a level to ensure proper alignment and tighten all screws firmly. Double-check the vanity’s stability by gently tugging on it. This method prevents movement and ensures safety, especially in high-traffic bathrooms. Proper securing guarantees long-lasting stability and prevents potential damage.

Budget-Friendly Options for DIY Bathroom Vanities
Use reclaimed or affordable materials like plywood and MDF to reduce costs. Explore free PDF plans online for cost-effective designs, ensuring a stylish vanity without overspending.
Using reclaimed or Affordable Materials
Using Reclaimed or Affordable Materials
Reclaimed wood, plywood, and MDF are excellent budget-friendly options for building a bathroom vanity. These materials are cost-effective and can be sourced from local hardware stores or Habitat for Humanity ReStores. Reclaimed wood adds a unique, rustic charm, while plywood and MDF provide a smooth, durable surface. Sanding and sealing these materials will ensure a professional finish. Using affordable options allows you to create a stylish vanity without breaking the bank, making your DIY project both eco-conscious and budget-friendly.
Free PDF Plans for Cost-Effective Projects
Free PDF plans are an excellent resource for budget-conscious DIYers, offering detailed step-by-step guides for building bathroom vanities. These plans often include diagrams, cut lists, and material recommendations, ensuring projects remain cost-effective. Websites like Rogue Engineer and Home With Stefani provide accessible designs, ranging from modern floating vanities to traditional shaker-style options. Perfect for beginners, these plans streamline the process, making it easier to create a stylish and functional vanity without overspending. They are a valuable tool for achieving professional results on a budget.
Troubleshooting Common Issues
Identify and resolve common issues like uneven surfaces or alignment problems by double-checking measurements and ensuring proper anchoring. Adjustments may be needed for a stable installation.
Addressing Measurement Errors
Measurement errors can lead to poorly fitting components. Always double-check your measurements before cutting materials. Use a digital caliper for precision. If errors occur, reassess your cutting list and adjust accordingly. Start with a small test piece to ensure accuracy. Consider using templates or diagrams from your PDF plans to guide your cuts. Correcting mistakes early prevents wasted materials and time. Proper alignment and careful planning are key to achieving professional results. Addressing errors promptly ensures your vanity fits seamlessly into your bathroom space.
Fixing Uneven Surfaces or Alignment Problems
Uneven surfaces or misalignment can compromise the vanity’s stability and appearance. Start by identifying the source of the issue. Use shims or adjustable feet to level the vanity. Sand uneven surfaces to ensure a smooth finish. Recheck all alignments using a spirit level and clamps to hold components in place while adjusting. For severe cases, consult your PDF plans for alternative solutions or adjustments. Proper alignment ensures a professional-looking finish and prevents functional issues. Addressing these problems early guarantees long-term durability and satisfaction.
Completing your bathroom vanity project brings a sense of achievement. Ensure all steps are followed for a polished look. Refer to PDF plans for guidance and enjoy your new space with pride!
Key Takeaways for Successful DIY Projects
Success in DIY bathroom vanity projects hinges on precise planning and execution. Always follow PDF plans meticulously, ensuring accurate measurements and material selections. Start with quality tools and durable materials to achieve longevity. Consider customization options like drawers or cabinets for added functionality. Test-fit components before final assembly to avoid errors. For beginners, simple designs are ideal, while experienced crafters can explore advanced techniques. Lastly, consult online resources for inspiration and troubleshooting tips to ensure a flawless finish.
Resources for Further Learning and Inspiration
Explore websites like Rogue Engineer and Home With Stefani for free PDF plans and tutorials. Instructables offers detailed guides, while YouTube channels provide visual demonstrations.Pinterest and Instagram showcase inspiring designs for modern and traditional styles; Blogs like The Spruce and DIY Network share expert tips and tricks; These resources cater to all skill levels, offering practical advice and creative ideas to enhance your bathroom vanity project. Use them to refine your skills and stay inspired throughout your DIY journey.
Get instant access to free bathroom vanity plans PDF. Perfect DIY guides for all skill levels.